I am still working out the glitches of creating content links within my own blog, so bare with me.=)
WOOD SHUTTERS:
These were another Pinterest Inspiration…but mostly inspired by Joanna Gaines (my BFF) of course. ;) There are a lot of different variations & styles for wood shutters, my favorite is the board & batten. Clean, simple, fresh & luckily for me, EASY. Once I decided on that style, I asked Jori his opinion on how hard he thought they would be for ME to build, not him. He replied, “Not too bad.” So off to Home Depot I went. I purchased wood picket fencing (yep, you heard me right)…this is a tried & true little secret of ours at the Ernst Home…not only does it get the job done, but it’s LOADS cheaper than other types of wood. The only thing you have to be careful of is shrinking. We also bought it for our huge masterbed headboard that Jori built & now that it’s been a few years, I am noticing big gaps between the slats (I’ll explain more on that later). I found my favorite stain by Minwax: Dark Walnut…it is the perfect in between color…not too dark, not too light & goes with EVERYTHING. I knew I wanted it to match the address number sign I had previously made (see above) and also wanted it to have that pop of warm color against the grey & white exterior paint.
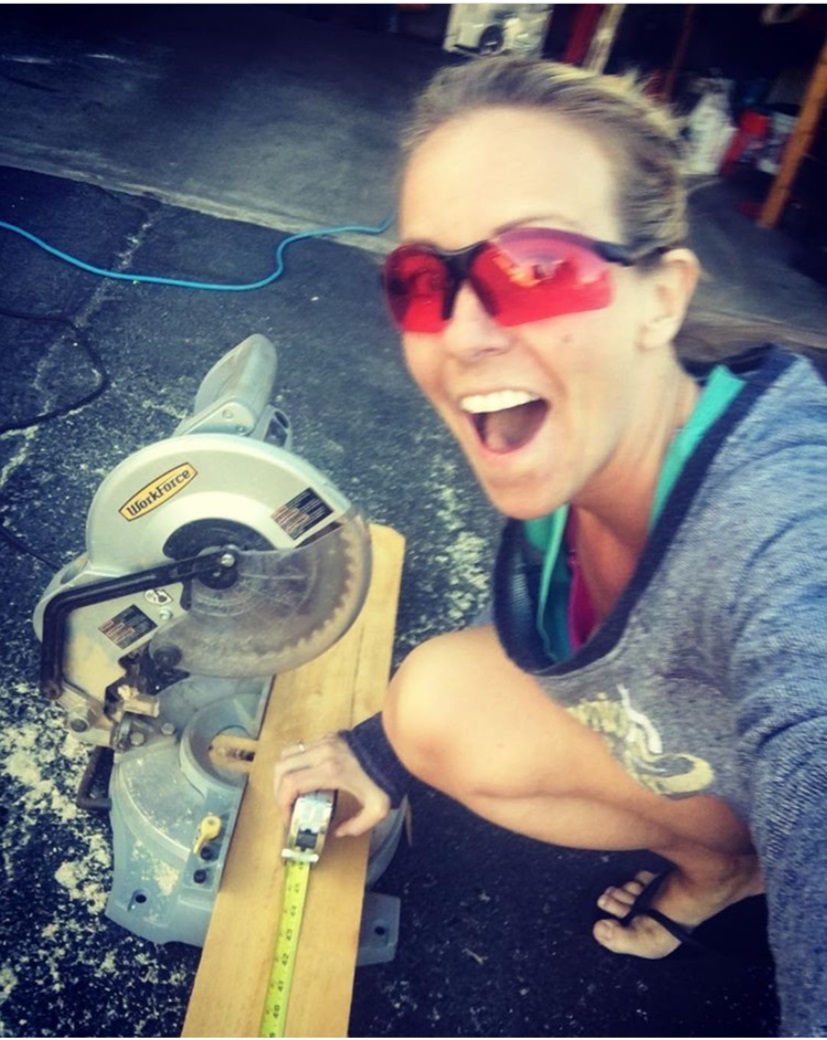
I can’t really give you step by step instructions since I made them nearly 2 1/2 years ago, but I can tell you I first counted the windows I wanted to do & doubled that number (1 set per side of each window). I eventually like to do them on the back of the house, but that’s for another day.;) Based on the board & batten style, I knew I would need 3 pickets on each side of the window, then measure your window & decide how long & wide you need each one. Then the fun part, getting to use the Chop Saw. Yep I forced Jori to teach me how to use it; despite the fact that he thought I would lose all my digits; I still have ALL 10 fingers thank you very much!;) Here’s a picture to prove it. =)
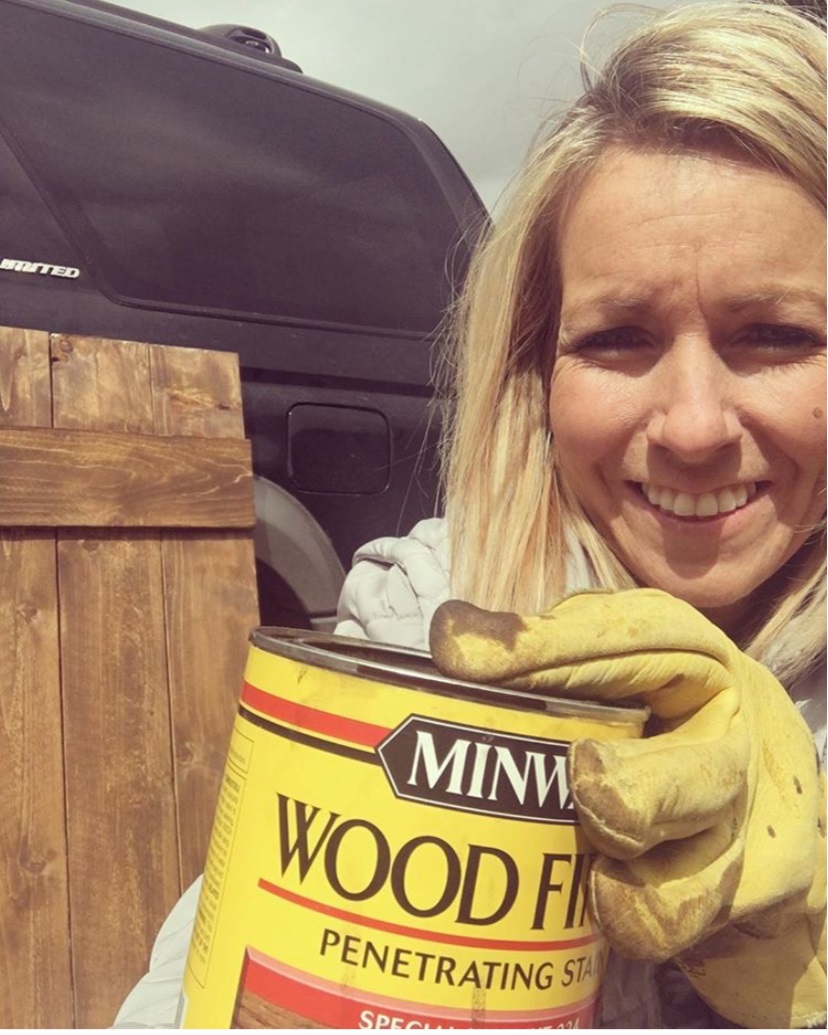
Once you have all your board cuts, then use a nail gun & attach them together…don’t forget to measure the width of all 3 pickets so you know how long to cut the two boards for across the top & bottom (the piece that looks like they’re holding the other boards together (but they’re really not)). Finally, stain (it only took me 20ish minutes to stain all of them…my favorite part). If you don’t want dark walnut hands for greeting at church, don’t forget to wear gloves. LOL!!! I NEVER wear gloves & am starting to be known as the DIY girl. Ha!;) Last, but not least, beg hubby to buy cement screws (if you are screwing through Stucco like we were) and hang them. I don’t mess with the details too often (Jori is my numbers man) besides that; they would be seriously crooked if I hung them. Ha-ha-ha!!! Here’s another picture of me staining them.
Notice the difference in wardrobe from first picture to last. Shorts to winter coat. Would you believe me if I told you these pictures were taken 48 hours apart? Fickle Colorado Weather. This was Spring of 2016. Insert Eye-roll Emoji. If you want more details, here is the link I followed (well sorta) from Pinterest: https://www.hometalk.com/8749883/how-to-build-board-and-batten-shutters?email=&cancel=
If you are looking for a great way to add curb-appeal, this is it. Easy & Fun & a big WOW statement in my opinion!!! =)